
Saturday, June 6, 2015
New Blog and website! HeathSmithPhotography.com
Well i just lunched a new site that gives in depth info on my image that i create and i show before and after images, how i got to the spot where i took the images, the things i was thinking about when i took the image. along with the camera settings, gear, and the number of shots it took. Well hope to see you there. Please come and see me at http://heathsmithphotography.com/
Friday, March 20, 2015
First Impression of the Sony A7R
So i just got a Sony A7R in the mail from DigitalRev.Com and i wanted to do a first impressions of it so far after 2 days of using it. very first impression of this was "oh my gosh it's so small!" This camera body is ridiculously small and it barely fits in the size of my hand which might be one of the downsides. After marveling at the size of it soon realize that most of my Canon lenses are going to be double the size of this body. One of the things that make this camera so special is the fact that you use adapters to use your current glass or vintage glass that is very unique to this camera system. I've been using only my Canon lenses on this so far and I'm going to separate focusing on it is sub par for what it should be doing. Just think of it as using your normal Canon camera in live you mowed and focusing like that all the time. However this camera does provide An excellent manual focusing system. The button layout is a little awkward at first however once you learn how to customize it, it then becomes quite fun.
Like i said, its more of a quick "hey i get this camera and going to test it out" so please stay tuned and i will post a video and a blog post about it soon!
Like i said, its more of a quick "hey i get this camera and going to test it out" so please stay tuned and i will post a video and a blog post about it soon!
Saturday, February 14, 2015
Shinjuku Best Photo Spots!

I have been living in Tokyo area for about a year now and i have found some of the best spots to photograph the local area and to capture the essence of this great part of Tokyo. It ranges from the back streets near the station to the high rise look outs that litter the area. Here is a Google Map that has all the local area marked out with a link to a image that i captured from that spot. Please enjoy and keep exploring!
Monday, February 2, 2015
Review of Oben CT-2381 Carbon Fiber Tripod Legs.
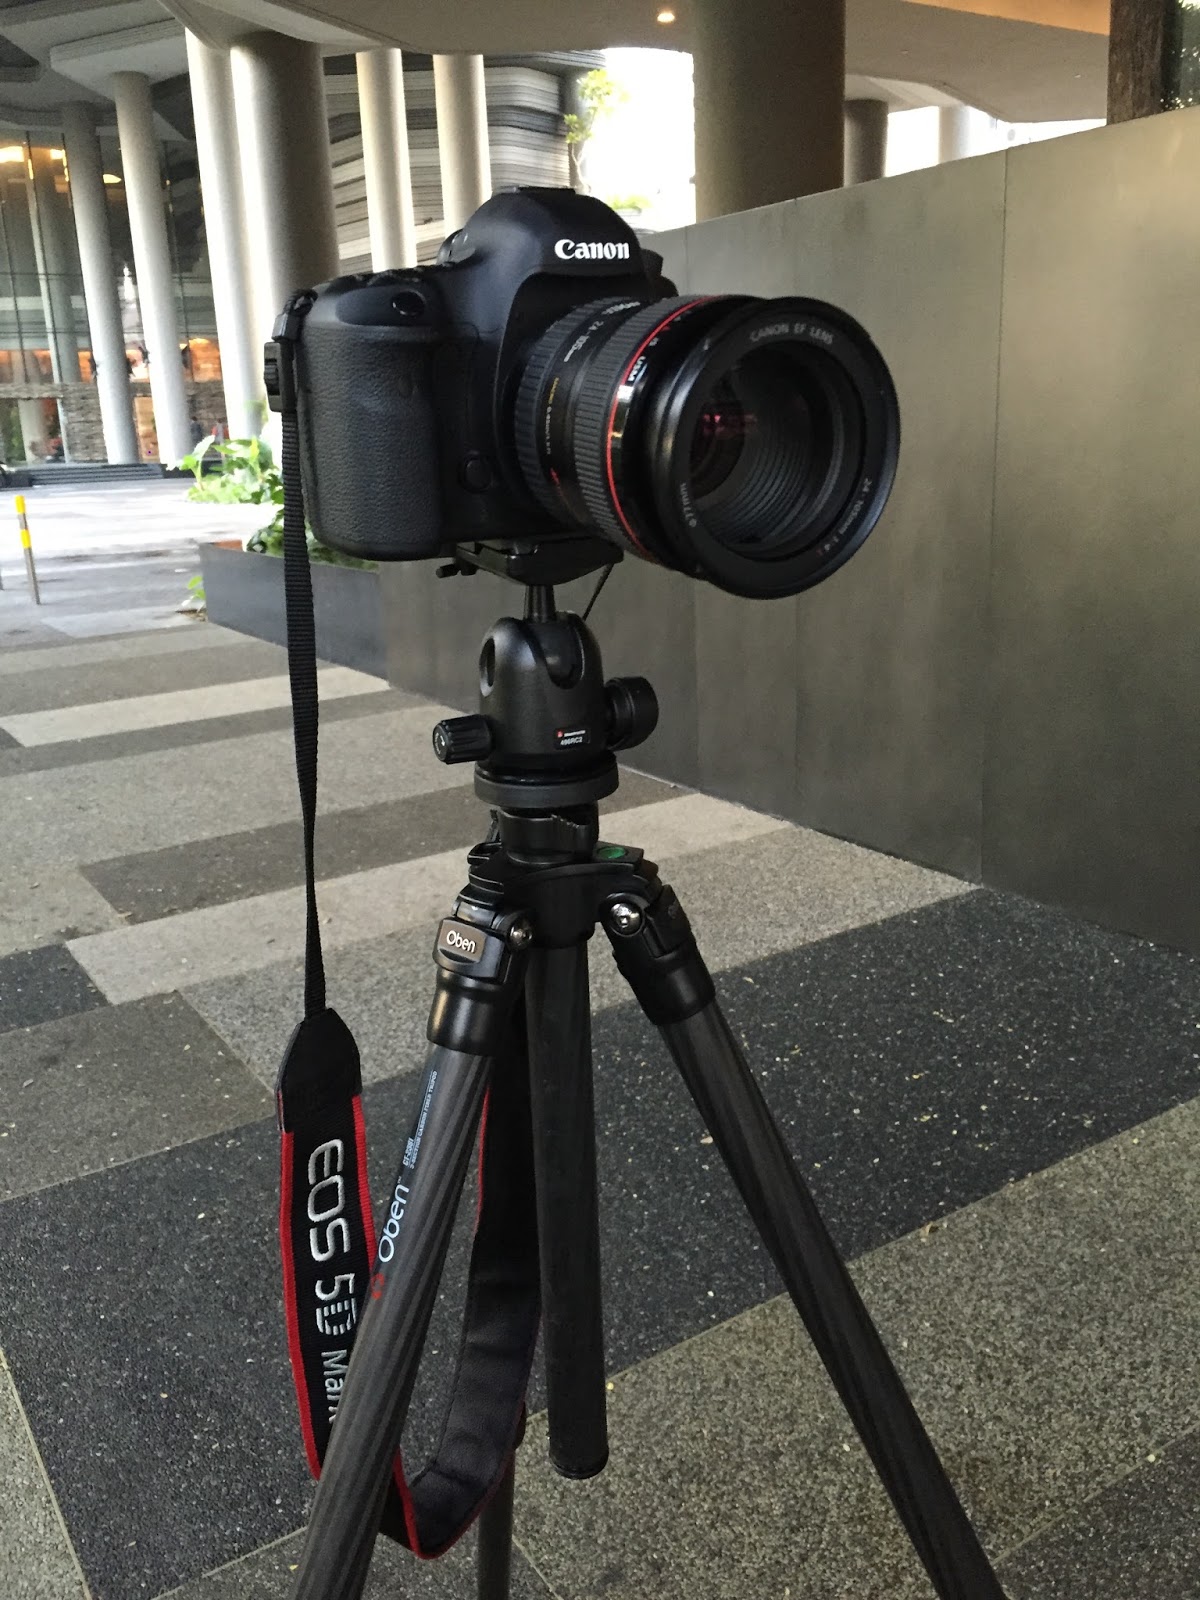 |
| Oben CT-2381 with 5Dm3 and 24-105mm |
1: It has to be carbon fiber Tripod cause i do a lot of traveling and traveling with a 4-5 lbs of cold metal just sucks.
2: Has to be at eye level with the center column not installed.
3: PRICE!! This is important to every Photographer starting out. Try and keep it down to about $300 USD.
So with the guild lines now set, it was time to search for this mystical tripod that is cheap like a manfrotto and built like a Gitzo begins! After looking around all the Photography sites, a brand called Oben Tripods keep popping up with some great reviews and fit almost everything i was looking for. I ordered a Oben CT-2381 Tripod with the twist locks from B&H Photo on that was on sale for $299.99 and that is about $50 off the normal retail price of 349.99. The Twist locks is one thing that i loved about the Cheap Chinese knock off so i wanted to bring to the next tripod. I received the tripod with flat rate shipping in about 2 weeks.
 |
| Me in a Pool in Singapore. |
 |
| Oben CT-2381 with the 3 sections fully extended. |
Oben has put themself in a very nice area where they are making quality items at a great price. I know that it might not have the fine Finnish that some brands offer like Really Right Stuff but it does the trick. The only thing i would have added to this set up is some foam type grips on the large part of the legs to help with the winter cold. The Tripod holds its own when i place my 70-200 F2.8 with a 5Dm3 and its rock solid. I would be scared to death to put that on my old tripod.
 |
| Oben CT-2381 looking at the Marina Bay Sands. |
Over all i think this is a very solid tripod that i would not hesitate to purchase again and again. So if you are looking towards a great tripod that will not set you back a crap load of money, This is your Tripod.
Cheers,
Heath
Thursday, January 15, 2015
Wednesday, January 14, 2015
Tuesday, January 13, 2015
Saturday, January 10, 2015
My Top 10 Images from 2014
Last year has been a interesting year with traveling and exploring and with my work. Along with seeing new parts of the world and learning new things from people in real life and from my favorite.... YOUTUBE. So i just wanted to post my Top 10 Favorite images of 2014. SO here they are! I am also working on a Ebook and some Google Maps for the best spots to see in each part of the city. Plus am working on posting more to my YouTube and Blog more often. Till then, Cheers!
#1
#2
#3
#4
#5
#6
#10

#1
 | |
| This is my Number 1 Image i think. This image started me down the road of light trails |
#2
 |
| This image is my #2 cause this is the one that i had to learn how to clone and recreate part of the image to remove a tree limb. |
 |
| This is my #3 cause it was my first time blending Light trails with a HDR image. |
 |
| This is my #4 image cause from what i learned from #3 and took it to the next level and did it with the lasers |
#5
 |
| This is #5 cause this is when i realized that my camera was weather sealed and i could get some amazing shots in crappy weather. |
 | |
| This is #6 cause this is the time i figured out how to shoot with with glass in front of me. |
 |
| #7 I started to explore more and found this spot and used what i learn from #6 to make this amazing shot of Shibuya crossing. |
#8
 |
| #8. learning how to get over the fear of shooting people. I started a project that i had to shoot people but had to wait for them to look at me. Check out more are..... |
#9
 |
| #9, learning to go back to past spots and learn how to look at things different and make it better. |
 | ||
| #10, Taking a note from +Trey Ratcliff on doing multiple layers of focus. |
And my runners up are.....
 |
| Snow Monkeys of Nagano |
 |
| Rainbow bridge on the Google+ photowalk |
 |
| Shibjuku On my photowalk with eyexploretokyo |
 |
| Google+ Photo walk Tokyo |
Subscribe to:
Comments (Atom)